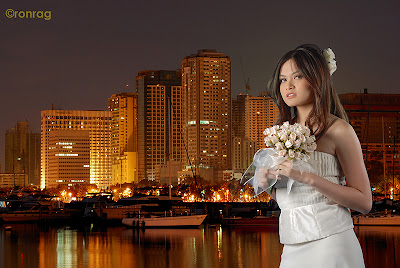
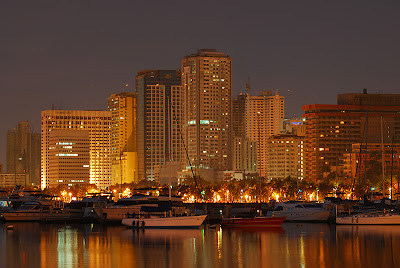
 Composite photos are two or more photos merged or combined together to form a single image. Compositing pictures can be easily done in Photoshop but I will limit my discussion here to merging two images only. First, pick your photos to be combined by opening both image then choose which one will be layered on top of a background image. In my samples, I picked a subject or a photo of a person to be my main image and an environmental or a landscape photo as my background image.
  I have to choose a photo with a plain background or any portrait shot in a studio with a solid color background would be fine. We can select the subject by using the Color Range Tool and point it to the colored background. Set the Fuzziness to a level where the selected portion would be uniform all throughout. In my samples, I set the Fuzziness to 100 but this may change according to each individual photo you're working with. When the selection is done, go back to Select -> Inverse to inverse the selection to choose the subject.
 Now that the selection (looks like a running colony of ants encircling the image) is transferred to the image of the person, click the Move Tool in the sidebar to activate it. Using the Move Tool, transfer the selected portion to the background image. You now have to scale the size of the main image to a size you think would suit on the background image. You can do this by going to Edit -> Transform -> Scale. You can now resize the main image. If you want to correct the perspective and adopt it the background image, use the Perspective option Edit -> Transform -> Perspective.
 The most common problem that I always encounter is how to smoothen out the selected image from the main photo when it is already transferred to the background image. There is usually a residual color from the background of the main photo that is also transferred to the background image. In my samples here, the sky blue color of the background from the main photo is too disturbing to be left ignored. I use the Eraser Tool set at a very low opacity to slowly but surely erase those unwanted color residue. You should zoom in on the image to work more accurately when you are erasing those residual colors and do this on the layer of the main image.
 When you're done with the resizing and erasing tasks, you can still move the selected image to any place or position on the background image as long as you have not flattened the layers yet. Once you are finished with these tedious tasks, you can now flatten the image. In my two samples, I preferred merging the layers first before proceeding with my usual workflow on image enhancement but nothing will prevent you from doing the image enhancement on the layers itself if that is your pleasure.
All images used in this tutorial are copyrighted and strictly prohibited for distribution or downloading without my express written consent. Special thanks to my two favorite models, namely Pearl (first model) and Madie (second model) and to Wren Yuson for doing the make-up and who, incidentally, is also one of my favorite model.
2 comments:
we use the same technique but finish differently. sampling the ambient colors and using photo filter will make it more realistic.
if the imgage allows it, you can also kill the color cast of the background using ctrl+U =D
i find it very admirable/ generous that you share your learnings and techniques via a blog like this.
hey JE, thanks for dropping by. i do keep some minor secrets. i didn't discussed the use of Selective Color adjustment layer. it is the final process i rely upon when I can't get rid of the residual colors using the Eraser Tool.
Post a Comment