Wednesday, October 31, 2007

my Nikkor 70-300mm f/4.5-5.6G IF-ED AF-S VR zoom

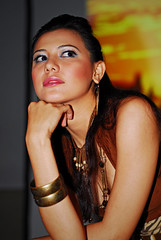
It's been more than a month since I acquired this lens from Mayer Photo and it replaced my Nikkor 50mm f/1.4D as my work horse lens since then. For shelling out a moderate amount of P25,000.00, I can now shoot in a low light environment on almost any place with poor light conditions, with its VR feature turned ON and pushing the ISO setting to ISO 800 . On an overcast day, like in the photo above, I can shoot at 1/60 without blur using a 170mm focal length at ISO 250. At this focal length, bokeh will appear on the background which is generally smooth and not crunchy compared to the blur produced by the Nikkor 18-200mm VR at the same focal length.


This lens is a full format lens suitable for any future full frame Nikon DSLRs like the D3 but with my D200, with a crop factor of 1.5X sensor, the scope of its field of view would be in the focal lengths of 105-450mm. The sample photo above was taken at 230mm focal length with a shutter speed of 1/200 at f/5.3 aperture in ISO 400. One can readily notice the smooth blur of the green grass which is called bokeh, or pleasant blur.

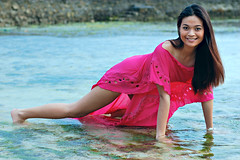
At ISO 400, one can get better color rendition than shooting at ISO 100, which is what i've experienced in the two or more years that i've been shooting in digital. Again, the sample photo on the right which was shot at ISO 400 is another classic example of a good color rendition.

With not much choice of lens, I tried the 70-300mm AF-S VR inside a studio with strobes as main sources of light, and the results were equally amazing - sharp image and accurate and fast focusing even in low light where my 50mm f/1.4D would have faltered and encoutered difficulty. The two sample photos on the left were taken at its shorter focal lengths and who says one can't use a telephoto in a studio set up?!

Of course, using the 70-300mm VR in a cramp studio would limit your ability to take better shots and would confine you to only facial or head shots or half body portraits. When using strobes, you should also turn OFF the VR function to save on battery power as the VR would be a useless feature when your subject is being lighted by strobes.

One last test I made on this lens was shooting with it indoors using continuous lighting from a home lamp. The result was the sample photo on the right which was taken at ISO 800 shooting at f/5 at a slow shutter speed of 1/8 at a focal length of 165mm. Without VR or any anti-shake feature, the rule of thumb would be to shoot at a shutter speed of 1/(focal length) or in this case 1/200 to avoid any blurring of the image. With the VR feature ON, one can have more luxuries in shooting in low light conditions.

Credits goes to the following in the order of their appearance from top to bottom: King, Margarette, Tey, Wren, Bianca and Pearl, I am very much grateful to all of you.

Sunday, September 30, 2007

lighting the nude

There are lots of ways to light a nude subject but in this particular shoot, I experimented with low key lighting. Low key light is characterized by predominantly dark areas than light. It is also interchangeably referred to as mood lighting where the light is used to illuminate the subject to evoke a certain mood or emotion.

When we say low key lighting, it doesn't mean that we have to underexpose the image. It is merely selecting a certain portion of the image where we choose to apply the light. In the first two photos I sampled, the light was placed overhead with the strobe set at half power to achieve a butterfly effect, meaning the light will taper down below the subject illuminating only a certain portion of the subject which in this case is the nude woman's breast and facial contours.

Low key lighting has always been a popular choice when lighting a nude subject. It is characterized by dark tones and minimal lighting to expose only a part of the subject while avoiding lighting up the background. In the last two photos I sampled, in addition to the main key light placed on top of the model, I used accent light which is either placed on the left side or on the floor beamed towards the model. The efect is a more illuminated subect but at the same time avoiding the extra lighting to strike on the dark background.

For credits on this shoot, I would like to express my heartfelt gratitude to Zette who, graciously and without hesitation, accepted my invitation to shoot her in birthday suit. Likewise to Pam D. for making that body art on Zette.

Friday, August 31, 2007

eyes that glisten

Time and again I'm very much fascinated by portraits with bewitching eyes. As they say, eyes are the window to one's soul and girls with sparkling eyes pierces the soul and emotion of its viewers. The technique I have been using to put a sparkle to my portraits' eyes came from a flickr friend named Elizabeth Salib who unselfishly shared her PS technique with no strings attached.
There are a lot of means to achieve a certain effect in Photoshop and this technique is just one of those ways of getting eyes that glisten. This is particularly useful in photos of head shots when you want to draw the attention of your viewers to the eyes of your subject. First, zoom in your image to isolate the eyes to get a bigger workspace. Duplicate the image to create a background copy. Then select the Dodge Tool with settings at 3% Exposure, Range at Highlights and slowly dodge to lighten the white part of the eyes to your desired taste. Next would be to dodge the iris to reveal its true color. This technique is particularly effective if you use it on people with colored eyes.

After getting the effect you wanted, duplicate the Background Layer to get a Background Copy 2. Move the Background Copy 2 layer above the Background Copy. Blend in Color Mode and adjust the opacity of the blending in the Background Copy layer. The result is a glowing iris and a more defined eyes making your portraits a lot more stunning with ethereal look.

Special thanks to my models above, namely Apple David and Sheena Marie Uy, respectively. The first two portraits were taken in available light with Apple David on location at Sonya's Garden in Alfonso, Cavite while the last two portraits were also taken in available light with Sheena on location at the Acosta-Pastor Residence in Batangas City.

Tuesday, July 31, 2007

the lady in red saved my lens

The Nikkor 50mm f/1.4D AF used to be my favorite lens, being the fastest lens that I have in my arsenal. Aside from being reasonably priced, it is dependable in low light photography with its aperture set at wide open. It is likewise capable of producing smooth blur or "bokeh" which is pleasantly silky at f/2.8 and wider. Being a prime lens, any amateur photographer or hobbyist alike shouldn't leave home without this "normal" or "standard" lens tucked inside their camera bag.

Lately, I was tempted to sell this precious gem and get myself a real portrait lens as what they call an 85mm f/1.8 to be. Last July 14, we had an out of town photoshoot in Batangas City and the location of the shoot is an old ancestral house of the Acosta-Pastor clan situated along D. Tirona St. in Batangas City.

When the magic hours started to set in, I went shooting outdoors and replaced my ultra wide lens (Nikkor 12-24mm f/4G) with my estranged normal lens (Nikkor 50mm f/1.4D). The drawback of using a fixed focal length lens is that your composition will be limited to cropping the image unless you resort to what we call in jest as "walk zoom" shooting where you either step back or move forward to get the framing you want for your image.

A little bit inconvenient but getting used to it should be a part of your work attitude. Patience being a virtue in photography, I did my composition by walking to and away from the model just to get that desirable framing in my viewfinder. The resulting images when seen after each click of the shutter is very rewarding to the visual senses. Rich and smooth bokeh will make you smile when you chimp after each and every push of the shutter release button. On this particular shoot, I fixed my aperture at f/2.8 since I had a terrible experience in the past when I availed of the widest aperture where the shallow depth of field ruined my photos.

ISO setting was dialed to ISO 200 to afford a little flexibility and to maintain a cleaner image. The shooting started off with Clarisse in red dress as my model. I started with the shoot by letting her pose by the Steinway piano sitting upstairs and with the aid of my reliable Nikon SB-800 speedlight, I balanced the lighting exposure provided by the available light coming from the window and the fill in light provided by the speedlight. The result - an astonishingly clean image of a lady in red dress with a smooth background of the fully furnished old Spanish style living room of the olden days.

Working outdoors, I kept the same setting but this time shooting in available light during the magic hours of the day. When we say magic hours, we usually refer to the window of time beginning 4pm up to 5pm in the afternoon where the outdoor lighting of the setting sun is occasionally diffused by the clouds above.

After the shoot and upon seeing my photos of Clarisse, I resolved not to sell my normal lens and decided to keep it for good. A wise decision indeed for the obvious reason that having a cheap lens like the 50mm f/1.4D would afford you few luxuries in composition on low light conditions. You just have to muster enough patience in walking to and from your subject to get an image which will suit your shooting style. That I don't mind at all and for now, this Nikkor 50mm f/1.4D will stay here for good. Thanks to the lady in red for without her as a very inspiring subject, I would have parted with this lens when I was visited by my lucid intervals.

For this shoot, I would like to give credits to the following who made this event possible: Igor for inviting us to join him, Gina Pastor and family for being such a gracious host, King for doing the make-up and to my fellow shooters, Joel, Tipoy and Jobert. Of course, we would also endeavor to thank our pretty models namely Clarisse, Sheena, Erika and Jonah.

Saturday, May 26, 2007

Apple at Eco Park

At the heart of the city lies an ecological park located near Fairview in Quezon City. Frequented by weekend promenaders, the La Mesa Eco Park is a favorite shooting venue among wedding photographers and hobbyists like me. One sunny Labor Day became a memorable day for having met this wonderful lady named Apple.

Gifted with natural talent of showing different emotions, she became a darling among some flickerians. A very patient girl, she can pose under the sun without qualms and complaints. This photo on the left is reminiscent of a scene from the classic "The Sound of Music" movie with her dress and the flower on the foreground providing a perfect subject for the grassy and hilly slope background. This photo eventually made it to the Nikon Stunning Gallery on May 15, 2007.


The photo on the left was taken at the Shell Flower Terraces, a favorite spot for taking prenuptial shots by wedding photographers. This is my favorite among the photos on this set. The model is simply emotive here and a fill in flash from an off-board Nikon SB800 speedlight contributed some dramatic lighting for this image.

Taken in available light near the Orchidarium, this photo shows Apple's knack for emotive posing as well as her versatility on producing different angles of view for the photographer to capture with a press of the shutter release button. Her simplicity without ever trying is very alluring.


The photo on the right was taken at the dock of the pond and was a capture of a candid moment when she was caught off guard who, upon calling her name, instantaneously looked at me while I was clicking for this shot.


The lagoon at dusk with a boat on the background is another marvelous backdrop for this kind of shot. Using a single off cam Nikon SB800 speedlight mounted on a deflector umbrella, this photo was captured using Nikon's Creative Lighting System of remotely triggering an off board flash in the commander mode. You may also configure the setting in such a way that the built-in light will contribute some fill-in light frontally into your subject.

This image is likewise a favorite of mine and using the same lighting set up mentioned above, the dark waters on the pond with faint reflections of light on the background is a fitting enhancement for a black on black theme photo.

Many thanks to Nuah Alpha Princess for being such an amazing person inside and out.

Thursday, April 19, 2007

Workshop at the Ranch

This project was inspired by Dave Black’s Photography whom I admire most for his unselfish effort of educating us with his lighting techniques and experiments on exploring the capabilities of Nikon Speedlights more particularly the SB800. Last April 7, 2007, I had a chance to apply what I’ve read and learned from his site and put into action my SB800 and a friend’s SB600.


Night shooting is the perfect occasion to do some experimentation on strobe lighting and how a different placement of the lights would change the mood of an image. By arranging the speedlights and adjusting their flash intensities, one can see dramatic changes on the image being produced. Just take a shot then look at your LCD display and do the adjustments right in your camera’s menu until you like what you’ve been seeing. That’s how Nikon makes life easier with its advance wireless i-TTL flash system. One is spared from going to each individual speedlights to do the adjustments.


Most of the sample photos posted here were the product of the classic three lights set-up - one speedlight on each side of the subject while a fill-in light from the built-in flash of the D200 was fired to further clean up the shadows.

The photo on the right was taken with the SB800 mounted on a deflector umbrella and was positioned on the right side about 50 degrees from the model. The SB600, fitted with a Stoffen diffuser was placed on the left side and beamed towards the model. The third light source came from the built-in flash of the D200 which was fired to fill-in some light. All of the lights' flash intensity settings were configured in TTL using the Commander Mode of the D200 and were triggered wirelessly in CLS fashion.

The photo on the left was taken on the poolside with Alyssa and Ylla posing together. Due to prevailing low light condition on the poolside, the ISO setting was pushed to ISO 640 to increase sensitivity. Shot in the Manual Mode, the focal length was 75mm, the shutter speed was set to 1/50 sec. and the aperture was f/6.3. The same three lights set-up was employed with the SB800 mounted on a deflector umbrella being placed on the right side while the SB600 with Stoffen diffuser was placed on the left directly beamed at the models. A fill-in flash from the D200 was also deemed necessary.

The photo on the right is a classic example of lighting the background to improve contrast and separation of colors. The placement of the lights being the same, the ISO was set to ISO400 but the flash intensities of both speedlights were increased. At 35mm focal length, the aperture was set at f/5.6 while the shutter speed remains constant at 1/50 sec. Since I was shooting with the VR on, a slower shutter speed can be safely selected to capture more light from the background.

With Alyssa sitting on the step of a steel ladder, a colored beach ball instantly became a good accessory for this shot. The lights placement being the same, the focal length was noticed at 56mm. The two Speedlights were in the Remote mode and are mounted to lightstands. Each of the speedlights are located approximately 12-15 feet away from the subject. With slight variation, the photo below utilized only one SB800 mounted on a deflector umbrella placed on the right side and slightly angled to light up the back of the model. With a fill-in light coming from the D200's built-in flash, a moody image of Ylla was captured sitting in front of colorful playpen as an interesting backdrop.

I would like to thank Lissa Co for being a gracious host and for inviting us over at their farm house in Lipa City, Batangas. Modelling credits goes to Alyssa and Ylla while make-up and styling was provided by Myca. To my other companions in this shoot namely Igor and Airic - thanks guys!!

Saturday, March 31, 2007

2007 Manila International Auto Show

The 3rd Edition of the Manila International Auto Show was held last March 28 up to April 1, 2007 at the same familiar venue at the World Trade Center inside the CCP Complex, Manila. Compared to last year's event, it is less prominent with the noticeable absence of Toyota among the exhibitors. Fewer booths were seen and there's a remarkable decrease in the number of attendees.


The event is an annual venue for car or motoring enthusiasts to take a closer look at the latest models and brands of cars and other motor vehicles available locally.

As usual, gate entrance fee was pegged at P50.00 per head which will entitle the guest to roam inside the venue and perhaps take pictures of pretty ladies and the cars they are promoting just like what i did when i went there for a peek. Entertainment is likewise offered on various times of the day and I was privileged to see Jennifer Lee (the girl on top photo) in person on the day I visited the venue.


From my observation, Subaru came in as the most flashy exhibitor during the entire duration of the event. Since this edition of the show was the baptismal year of their participation, they paraded their popular Impreza line, a perennial contender in the World Rally Championship racing. The Subaru Impreza WRX is a turbo-charged 2.5 liter class all-wheel drive automobile.

Predictably, if there are good-looking cars, there must be some charming and pretty girls along side these gorgeous cars. Sarah, an Elan International model was among the familiar faces I saw gracing the Subaru booth, of which I was lucky again to have been granted the privilege of taking a few snapshots of her. This photo of Sarah made it to the Nikon Stunning Gallery days after it was posted in flickr.

Joanne, another pretty lass and upcoming model is likewise seen here among the Subaru girls.

Another exhibitor, Motolite, a local manufacturer of motor vehicle batteries came up with a different theme. They showcased a highly modified car, replete with colorful paint works and lighting effects to demonstrate and show off their batteries' superiority in providing power to a motor vehicle.

Wednesday, February 28, 2007

my NSG photos

The NSG is the term i coined to that flickr-oriented website found at www.nikonstunninggallery.com . I started tagging my photos with "nikonstunninggallery" as early as August 2006. I was very much elated when my initial offering was picked by Nikon and that was the portrait of Camille taken at a bar (see lower-most photo).

Diane Claire
Originally uploaded by ronrag.


The NSG site is a Nikon sponsored Flickr gallery of "stunning" pictures shot from, and taken by, a Nikon camera. It is supposed to showcase "stunning" photos from the point of view of Nikon inasmuch as they are the ones who pick and choose which photos qualify to their standards as worthy of being publicly displayed in the NSG website.

April
Originally uploaded by ronrag.


Nikon chooses an undetermined number of photos which they feature and add to the gallery once or twice a week. The frequency and the days when they pick the "stunning" photos are invariably unpredictable to make it more appealing and exciting to Nikonians who wishes to see their photos featured and added to the gallery.

Kiomi
Originally uploaded by ronrag.


Here are some tips that i have logically discovered on how to increase your chances of making it to the NSG. Your photos should have EXIF files showing that it was indeed taken by a Nikon camera (that is obvious, right?) As much as possible, tag your photos with Nikkor lenses you used in taking those photos. Nikon wants to highlight the superiority of their lenses too and they know very well what lenses they have in their archives and what lenses they do not manufacture. I've submitted quite a number of photos taken from Sigma lenses and only one of them was inadvertently picked (i guess) by Nikon.

Nikon girl
Originally uploaded by ronrag.


Since they only select photos once or twice a week, post your best photos tagged with "nikonstunninggallery" three to four days after they made their last pick. No matter how stunning your photos were, if they were posted right after they had already made their selection, chances are, those photos will be overwhelmed by succeeding photos posted right after yours. Nikon only sees the latest posted images first and by the time they have seen your photos, they have already picked and selected several photos as their featured photos of the day.

Jorgette
Originally uploaded by ronrag.


Avoid putting signatures or watermarking to your photos. Nikon wouldn't want you to be that famous, you know!! Another point to consider is to refrain from too much image manipulation and tag or post only photos that are natural looking or those photos which are minimally photoshopped.

Ruby
Originally uploaded by ronrag.


Be considerate to others and let them have a share of the limelight too! When you already have a featured photo on the first page of the NSG, refrain from posting any further. Wait until your photo moved down to the second or third pages and that would be the best time to tag your candidate photos again. Lastly, don't fool yourself - make sure that what you're posting are indeed "stunning" photos from your own honest to goodness assessment!!

Camille
Originally uploaded by ronrag.