Sunday, April 30, 2006

sunset photography

Sunset photo graphy fascinates a lot of people because of the rich colors and warm tones they usually offer. One cool rule in shooting sunrise and sunset is to keep in mind that the sun rises in the east and sets in the west. We're quite lucky to have our Manila Bay on the west where the sun sets on the bay horizon.

Photo graphing sunsets can be tricky because the scene you may want to capture fades away in a blink of an eye, so an early preparation and set up of equipment is very much advisable. Perhaps, the best lens to shoot with is a tele-zoom lens with a range of at least 200mm on the far end of the zoom if you want to make the sun a bigger piece of object in your photo. When shooting with telephotos, tripod can be useful to eliminate or minimize blur.

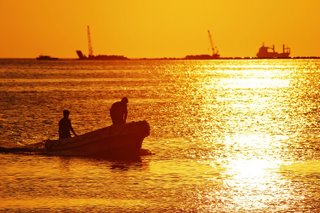
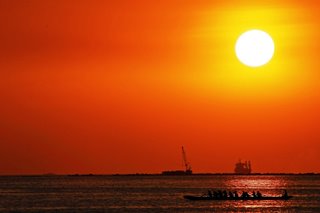
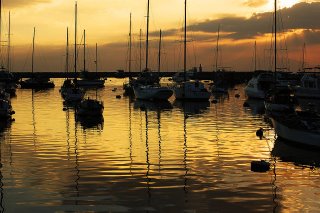
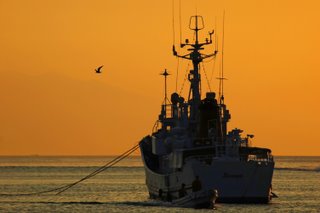
With the advent of digital cameras where you can preview your shots, exposure settings can easily be had. I shoot sunsets before, during and after the sun appears on the horizon. In most cases, spectacular sunset shots can be had after the sun had already disappeared in the horizon. A good example of this is my photo of yachts below where the sky casts a visually appealing tone on the waters. Sunset shots taken before the sun appears in the sky are equally magnificent too and a good example of this are the first two photos above.

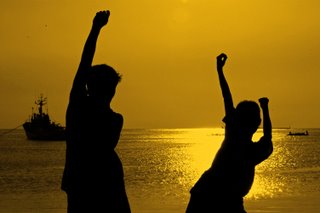
I occasionally under expose my sunset shots because of the over powering light of the scene. Since the sunlight may become so bright and dominant, don't stare at the sun for quite too long using your viewfinder to avoid any eye problem. I usually meter and adjust my settings in the manual mode with two to three stops underexposure either on the aperture or shutter controls but always choose a small aperture to achieve a more expansive depth of field. To add spice to a sunset shot, it also wise to frame some silhouetted figures such as boats, buildings, bridges, people or trees to impart a better scale, depth and perspective on the photo.

Another cool rule when taking sunset shots is never divide your photo in the middle. Either you emphasize the sky or the foreground but do not place the division in the middle. As you may see on the examples I've posted, emphasis is either given on the sky or on the waters depending on what you want to achieve. Sunset shots should either accentuate the colors of the sky or the reflections on the waters or both.

Posted by Picasa

Wednesday, April 19, 2006

Photographing the nude

Photo graphing the nude is perhaps one of the most popular branch of photo graphy for the obvious reason that we are all perpetually attracted to the human body of the opposite sex. I had my first experience to shoot a naked woman just recently and to tell you the truth, it's not a worthwhile experience taking photos of the nude body the first time around for lack of knowledge on how to do things smoothly.
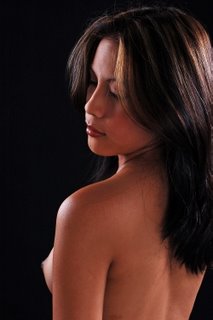
A successful nude shot would be that of being able to show the curves of a woman and the shape of the female body and if you can catch an emotion, then it would be an embellishment to the photo. Lighting plays an important factor too and the proper placement of light sources would be critical in creating the right mood. Light and shadows can make or break a nude photograph so you must be selective on your choice of background and decide on where to place your model in relation to your sources of light. A plain black background is always a favored choice and will highlight the natural tone of the female skin. As much as possible, using colorful backgrounds should be avoided unless you want to take away the mood in your photos.
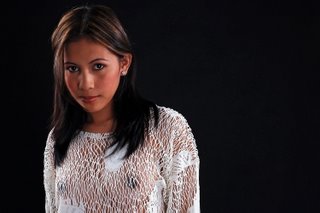
On how I took these shots, I let the model do the posing without much inter vention and according to her choice of comfortable positions and projections that in her opinion and previous experience would exude much of her sensuality. The photo session I attended was held in a studio with four other photographers who are all newbies in this field of photography. Our lack of familiarity of what the rules should be and the seemingly conflict of views on what should be done with the model negated an opportunity to capture excellent nude photography.

Joining a photo shoot with several photo graphers in one session may not be an ideal event to harness one's creativity but nonetheless, it was a learning experience for me on proper lighting and correct exposure settings in a studio backdrop.

Sunday, April 09, 2006

Radial Blur

The use of the blur filter in Photoshop can be an effective tool in eliminating distraction while at the same time impressing an abstract effect on your photo. The effect is also applied to isolate a subject or draw attention to a part of a picture. Radial blur can be most effective when your subject is in the center of your image like the two cars shown in my example. The simplest way of achieving this effect are as follows: open your image in photoshop, zoom in to have a larger workspace. select the subject using the polygonal lasso tool or any selection tool. inverse your selection, feather your selection to at least 5 pixels if you're working on a large image, apply the blur, which may either be the spin blur or the zoom blur, and that's about it.

The yellow car above is an example of a zoom blur while the red car below made use of the spin blur to suggest a spinning motion or a vertigo effect. If used on the moving car or any subject in motion, the radial blur can also be an effective way of dramatizing speed.

Saturday, April 01, 2006

Corregidor, "Fortress of Freedom"

Also known as the "The Rock", Corregidor is an island fortress built and fortified by the Americans during the

early 20th century when the United States succeeded control of the island from the Spaniards. The island, strategically located on the mouth of the Manila Bay, was the last to fall into the hands of the Japanese Imperial Army during the World War II. After being restored and developed by the Corregidor Foundation, the island is now a memorial of the Pacific War leaving behind ruins of buildings, antiquated big guns, tunnel and tell tales of bravery and heroism of Filipino, American and Japanese soldiers who fought and died for glory during World War II.

Middle Side Barracks, located at the middle sector of the island, these are the ruins of what used to be the barracks of regiments of American and Filipino soldiers who defended the island.

Malinta Tunnel, basically used as a bomb shelter offering protection from artillery and air attacks. it also served as a seat of the Philippine Government and headquarters of the USAFFE Defense Command during the World War II.

The photo on the right is bus replica of a pre-war tram used as a means of conveyance in the island


The Battery Way boasts of four heavy mortars capable of lobbing explosive shells in any direction.

the barrel of one of the four mortar guns at the Battery Way. converted to B&W and added a film grain

the photo on the left was post processed in PS CS2 to get the desired Holga effect

Battery Hearn, this gun emplace- ment hosts the most powerful cannon during its time, capable of firing projectiles reaching as far as Bataan and Cavite. extensively manipulated in photoshop to achieve an old look effect.

Battery Grubbs, is located on an elevated part of the island overlooking the sea. it was armed with two guns mounted on disappearing carriages which will rise up vertically when firing projectiles but will retract back to its normal position after usage under the cover of thick walls beyond the sight of enemy ships.

a stairway in Battery Grubbs leading to an open view of the Manila Bay from the northwest side of the island

Battery Grubbs is situated on the west central part of Corregidor and this gun emplace- ment was intended to fire towards the direction of northwest.

Pacific War Memorial, a tribute to honor the Filipino and American soldiers who fought in the Pacific War. located at the Top Side of the island.

one of the howitzers stationed on the Parade Ground on the Top Side of the island. converted to B&W and added a film grain effect


Pacific War Memorial Museum, located at the Memorial is a repository of relics and memorabilia related to the history of Corregidor.

Eternal Flame of Freedom, located at the rear end of the Pacific War Memorial atop a platform overlooking the panoramic view of the Manila Bay, the Bataan Peninsula and the coastlineof Cavite. It is a large steel sculpture which symbolizes the Flame of Freedom burning eternally. The sculpture commemorates the sacrifices, hopes and aspirations, and the heroic struggle by the Philippines and the United States to preserve freedom for future generations.

Spanish Lighthouse, located at the highest point of the island on the Top Side. The second lighthouse constructed by the Americans to replace the original Spanish lighthouse was destroyed during the Pacific War. This post war lighthouse was built on the same site where the original Spanish lighthouse was erected. If you're on top of the lighthouse, a breath-taking view of Corregidor, Manila Bay, the South China Sea, and the neighboring provinces of Bataan and Cavite, awaits you.

a pole sign within the lighthouse compound showing the relative direction and distance of some key cities.


communication tower beside the lighthouse

Japanese Memorial Garden, located at the tail end of the island, this garden hosts several memorial shrines and markers. The construction of this garden was partly funded by some Japan based private groups.


our group shot in front of Malinta Tunnel
Tuesday, March 28, 2006

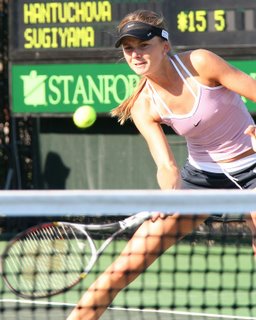
Daniela Hantuchova

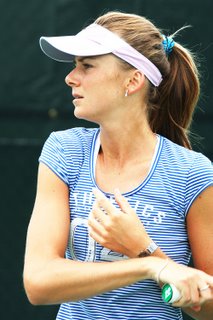
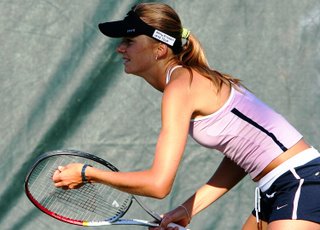
Here’s a profiler of Daniela Hantuchova, my favorite woman tennis player. Born on April 23, 1983 at Poprad, Slovakia, she presently resides in Monte Carlo, Monaco. Standing at a modelesque height of 5’11 ¼” (1.81m) and weighs in at 123 lbs (56 kgs.), she’s a right-handed player and returns the ball with a two handed back hand. She turned professional on 1999 and won her first career singles championship at the Indian Wells in 2002. She achieved her highest WTA career singles ranking at No.5 on January 27, 2003 which was considered as her best year so far in pro tennis.

She plays on court using Yonex racquets and wears Nike clothes and Nike Vapor S2 tennis shoes. Presently ranked at No. 15 in the WTA Rankings, her favorite surface is grass and considers the Wimbledon as her favorite tournament.

An energetic and gutsy player, she displays sobriety under pressure and she never questions any bad calls, a wholesome attitude in her that I would admire the most. She doesn’t grunt like Maria Sharapova which I find too unfeminine. I might say, she’s more of a finesse player comparable to the likes of Chris Evert during her younger days. I love the way Daniela smiles and how she makes it look so easy to play graceful tennis. I’ve read about how loyal she was to Ai Sugiyama who’s been her doubles partner for quite sometime. Rumours had it that she declined playing with Martina Hingis in doubles play because she wants to stick it out with Ai Sugiyama. A depiction and epitome of how loyalty and friendship should be!

The most memorable match I’ve seen of her was when she lost to Maria Sharapova in Round of 16 at the 2006 Australian Open. The dream match I would love to see most is how a match between two of my favorite woman players, Daniela Hantuchova and Ana Ivanovic, would turn out to be if they play against each other. I wouldn’t cheer for anyone of them but would be glad to see who’s going to be the more finesse player.

photo credits belong to Robyn Wilson and you can read more about pro tennis tour at her Planet Tennis Fan blog while you can view more of her photos thru Flickr.

Sunday, March 26, 2006

Faux Vignetting Technique


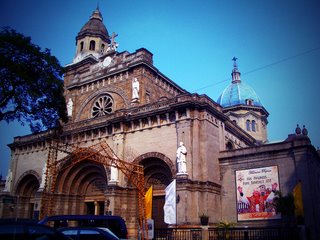
Vignetting in a photograph was previously considered a lens attribute or a lens defect inasmuch as the lens cannot transmit light equally to all parts of the frame most especially on the edge corners. Wide angle lenses are more prone to vignetting inherently due to lens design where light fall off on the corners of the frame is a natural occurrence. With the advent of photo editing softwares like PhotoShop, creating vignettes in a photo is now a breeze. Vignetting is now used mainly for creative effects of drawing attention to the center of the frame.

The photo above, taken at the Harbour Square near Manila Yacht Club along Roxas Boulevard in Manila, is an illustrative example of how a vignetting looks like. It was post processed in PhotoShop CS2 version.

Shown below is another post processed example of vignetting. On PhotoShop, go to Filters --> Distort --> Lens Correction and play with the Vignette slider.
The photo on the right is the Manila Cathedral, also known as the Minor Basilica of the Immaculate Conception. It is the ecclesisastical seat of the Archdiocese of Manila. This present structure was constructed in 1954 to 1958 under the leadership of Archbishop Rufino Santos of Manila (who later became the first Filipino Cardinal) and under the supervision of National Artist for Architecture Awardee, Architect Fernando Ocampo. It was elevated into the rank of Basilica Minore in 1981 by Pope John Paul II.

Sunday, March 12, 2006

miniaturized effect

I've been seeing a lot of photos simulating the effects of tilt-shift lenses lately. I tried doing my own version of fake model photography with few variations from the usual techniques employed by some photoshop geeks. Using the radial gradient tool in the quick mask mode, i was able to select the portion where i would apply the blur. Since we are simulating the tilt-shift lens, it is only proper to blur the unwarranted portion using the lens blur filter. To get a good artificial contrast, the curve adjustment layer is used to blow out the colors in the image. To achieve a level of distortion to impart a feeling of artificiality and to simulate false lighting on the model, i applied some vignetting effect putting some gaussian blur on the extreme four corners of the image. Another desirable effect would be to render some simulated lighting like omni-directional lighting or spotlight effects using the render filter -> lighting effects. The photo above was the result of the simulation of a tilt-shift lens effect of the photo shown below.

Monday, March 06, 2006

the f/1.4 advantage

Aside from being the only choice lens in available light photography, another advantage of a wide aperture lens or the so called "fast lens" is that it is capable of producing a nice blur or "bokeh". There are only few fixed lenses that can go as wide as f/1.4, namely, the 50mm normal lens, the wide 35mm and the 85mm portrait lens. Gone are the days when the kit lens of an SLR you would purchase was bundled with a 50mm normal lens. Interchangeably called as the "standard" lens, the 50mm fixed lens was virtually replaced by the more convenient stock zoom lenses of today like the 18-55mm zoom or 18-70mm zoom. Lesser informed consumers never realized that a fast prime lens like the 50mm is a lot more superior in many aspects than the present day consumer zooms. An f/1.8 50mm is considered a fast lens by any standards. It offers greater speed, that is, it can allow more light to seep in thru the lens. Compared to a consumer zoom with f/3.5-5.6 minimum to maximum apertures, the former has the advantage of having at least 3 stops which makes a very significant difference especially in available light photography. This extra stops can let you shoot indoors and with today's DSLRs where you can push the ISO to at least the standard 1600, it would afford you few luxuries in composition in low light conditions. Since the trend of consumerism by the camera manufacturers is to float the inferior stock zooms, the need to buy an off-camera flash becomes a necessity. Thus, these manufacturers will end up raking more money into their coffers. I still believe that full understanding of photography, most especially the lighting techniques, should first begin with the mastery of the "classic" 50mm lens - being the sharpest lens there is.

Friday, March 03, 2006

hygrometer

the Philippines is such a humid country most especially during the summer months of March to May. to protect my spare lens from fungus growth, i put it in an improvised "dry box", which is actually an air tight transparent food keeper, with several sachets of silica gels and a hygrometer to monitor the moisture content. if the moisture inside the box reaches a relative humidity of more than 60%, then it's time to recharge the silica gels by putting them under the sun until the red "beads" turn into blue.

Sunday, February 19, 2006

Bowers & Wilkins CDM1SE

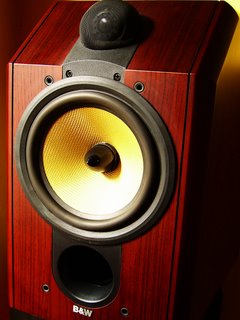
Bowers & Wilkins, one of Europe's biggest manufacturer of loudspeakers, developed the use of Kevlar, the material used in bullet-proof vests, for loudspeaker cones to reduce unwanted standing waves. The tweeter on top technology ensures that the sound remains focused and that stereo imaging is presented in three dimensional accuracy.
This model, a CDM1SE, is a pricey bookshelf speaker system when it was first introduced in the market five years ago. It was already superceded by newer models but compared to current models, it never pales in comparison to any one in its class!

Saturday, February 04, 2006

Bokeh

Bokeh is a Japanese word and it means "blur", "fuzziness" or "dizziness". As a photo- graphic term, it is the word used to describe a nice or pleasant blur in a photo. A camera lens capable of producing a good bokeh or the out of focus areas in a photo is a desirable lens in portraiture applications for the simple reason that it reduces distractions by rendering the foreground and the background in an out of focus state thus drawing more attention on the subject to make it a stand out. A camera lens with a wide aperture produces a nice bokeh. The sample photo shown was taken by a Nikkor f/1.4 AF-D 50mm lens.
Sunday, January 15, 2006

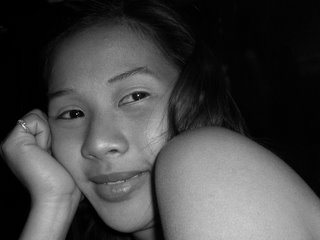
Low Key Portrait

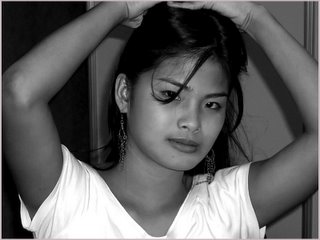
In a low key portrait, there is a dominance of a dark background and this requires a more subtle lighting to create a mood and statement. The goal or purpose of the photographer in a low key portraiture is to create images with vitality and luminance despite the lack of brightness or a darker tonal balance of the photo.

In this portrait, I added a deep blue photo filter and a mist filter to create a subtle tone and to draw the eyes of the viewer to study and appreciate the image more.

Tuesday, January 10, 2006

High Key Portrait

High key portrait is fast becoming a popular branch of portraiture nowadays. It is basically a kind of portrait where the subject or the person being photographed is placed on a light or clean background with the sole purpose of drawing the eyes of the viewer to the subject and away from any distracting objects in the background since there is no background object at all in the first place. This isolation of the subject creates a high impact image more especially if they are presented in Black & White.

What I did here is a simulation of high key portraiture using the PhotoShop. I used the extract tool to remove the background, layered it to a white background, converted it to B&W, pushed the curves to create a wash out effect and adjusted the highlights to fine tune. I was about to add a diffuse glow filter but my better judgment prevailed upon me to stop!

Thursday, January 05, 2006

Black & White Conversion Technique in PhotoShop


Converting a digital color photograph into a black and white gives a totally different look into a photo. There are various ways of doing this and based on my experience after trying out several techniques, I discovered an effective method which I will share here.


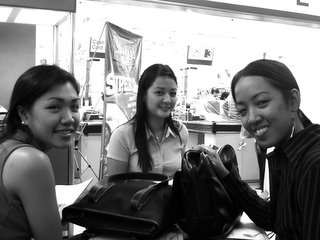
First, using the Curves Adjustment Layer, i tune the contrast of the photo to a desirable sharpness. Then, I desaturate it using the desaturate adjustment layer. Applying the shadow-highlight adjustment layer dropping down all options, i play with all the parameters available to get the desired effect. This technique was the one I applied in the two photos above.


My old method of Black and White conversion is done thru the Channel Mixer. This tool allows the user to control how much each of the three color channels (Red, Green and Blue channel) will contribute to the grayscale brightness of the monochrome version of the photo. The last two photos above were converted into black and white using the channel mixer tool.